Wi-fi doorbell
I recently moved house. Unfortunately the doorbell was pretty rubbish, and you couldn’t hear it in most of the house. Now, I could have gone to the local hardware shop and bought a new wireless doorbell but then, well, I’d have nothing to write a blog post about.
In my living room I have an O2 Joggler running Kodi, so my initial plan was to make something that would play a sound on the Joggler. I also ended up adding a camera and mobile push notifications so that we can hear the doorbell wherever we are.
Components
- Raspberry Pi Zero W with male GPIO hammer headers.
- Adafruit rugged metal pushbutton with LED ring
- Short female GPIO headers
- Weatherproof ABS enclosure
- 3m micro USB cable
- 5m 2-core flex
- Mini cable trunking
- USB webcam
- Sugru
Build
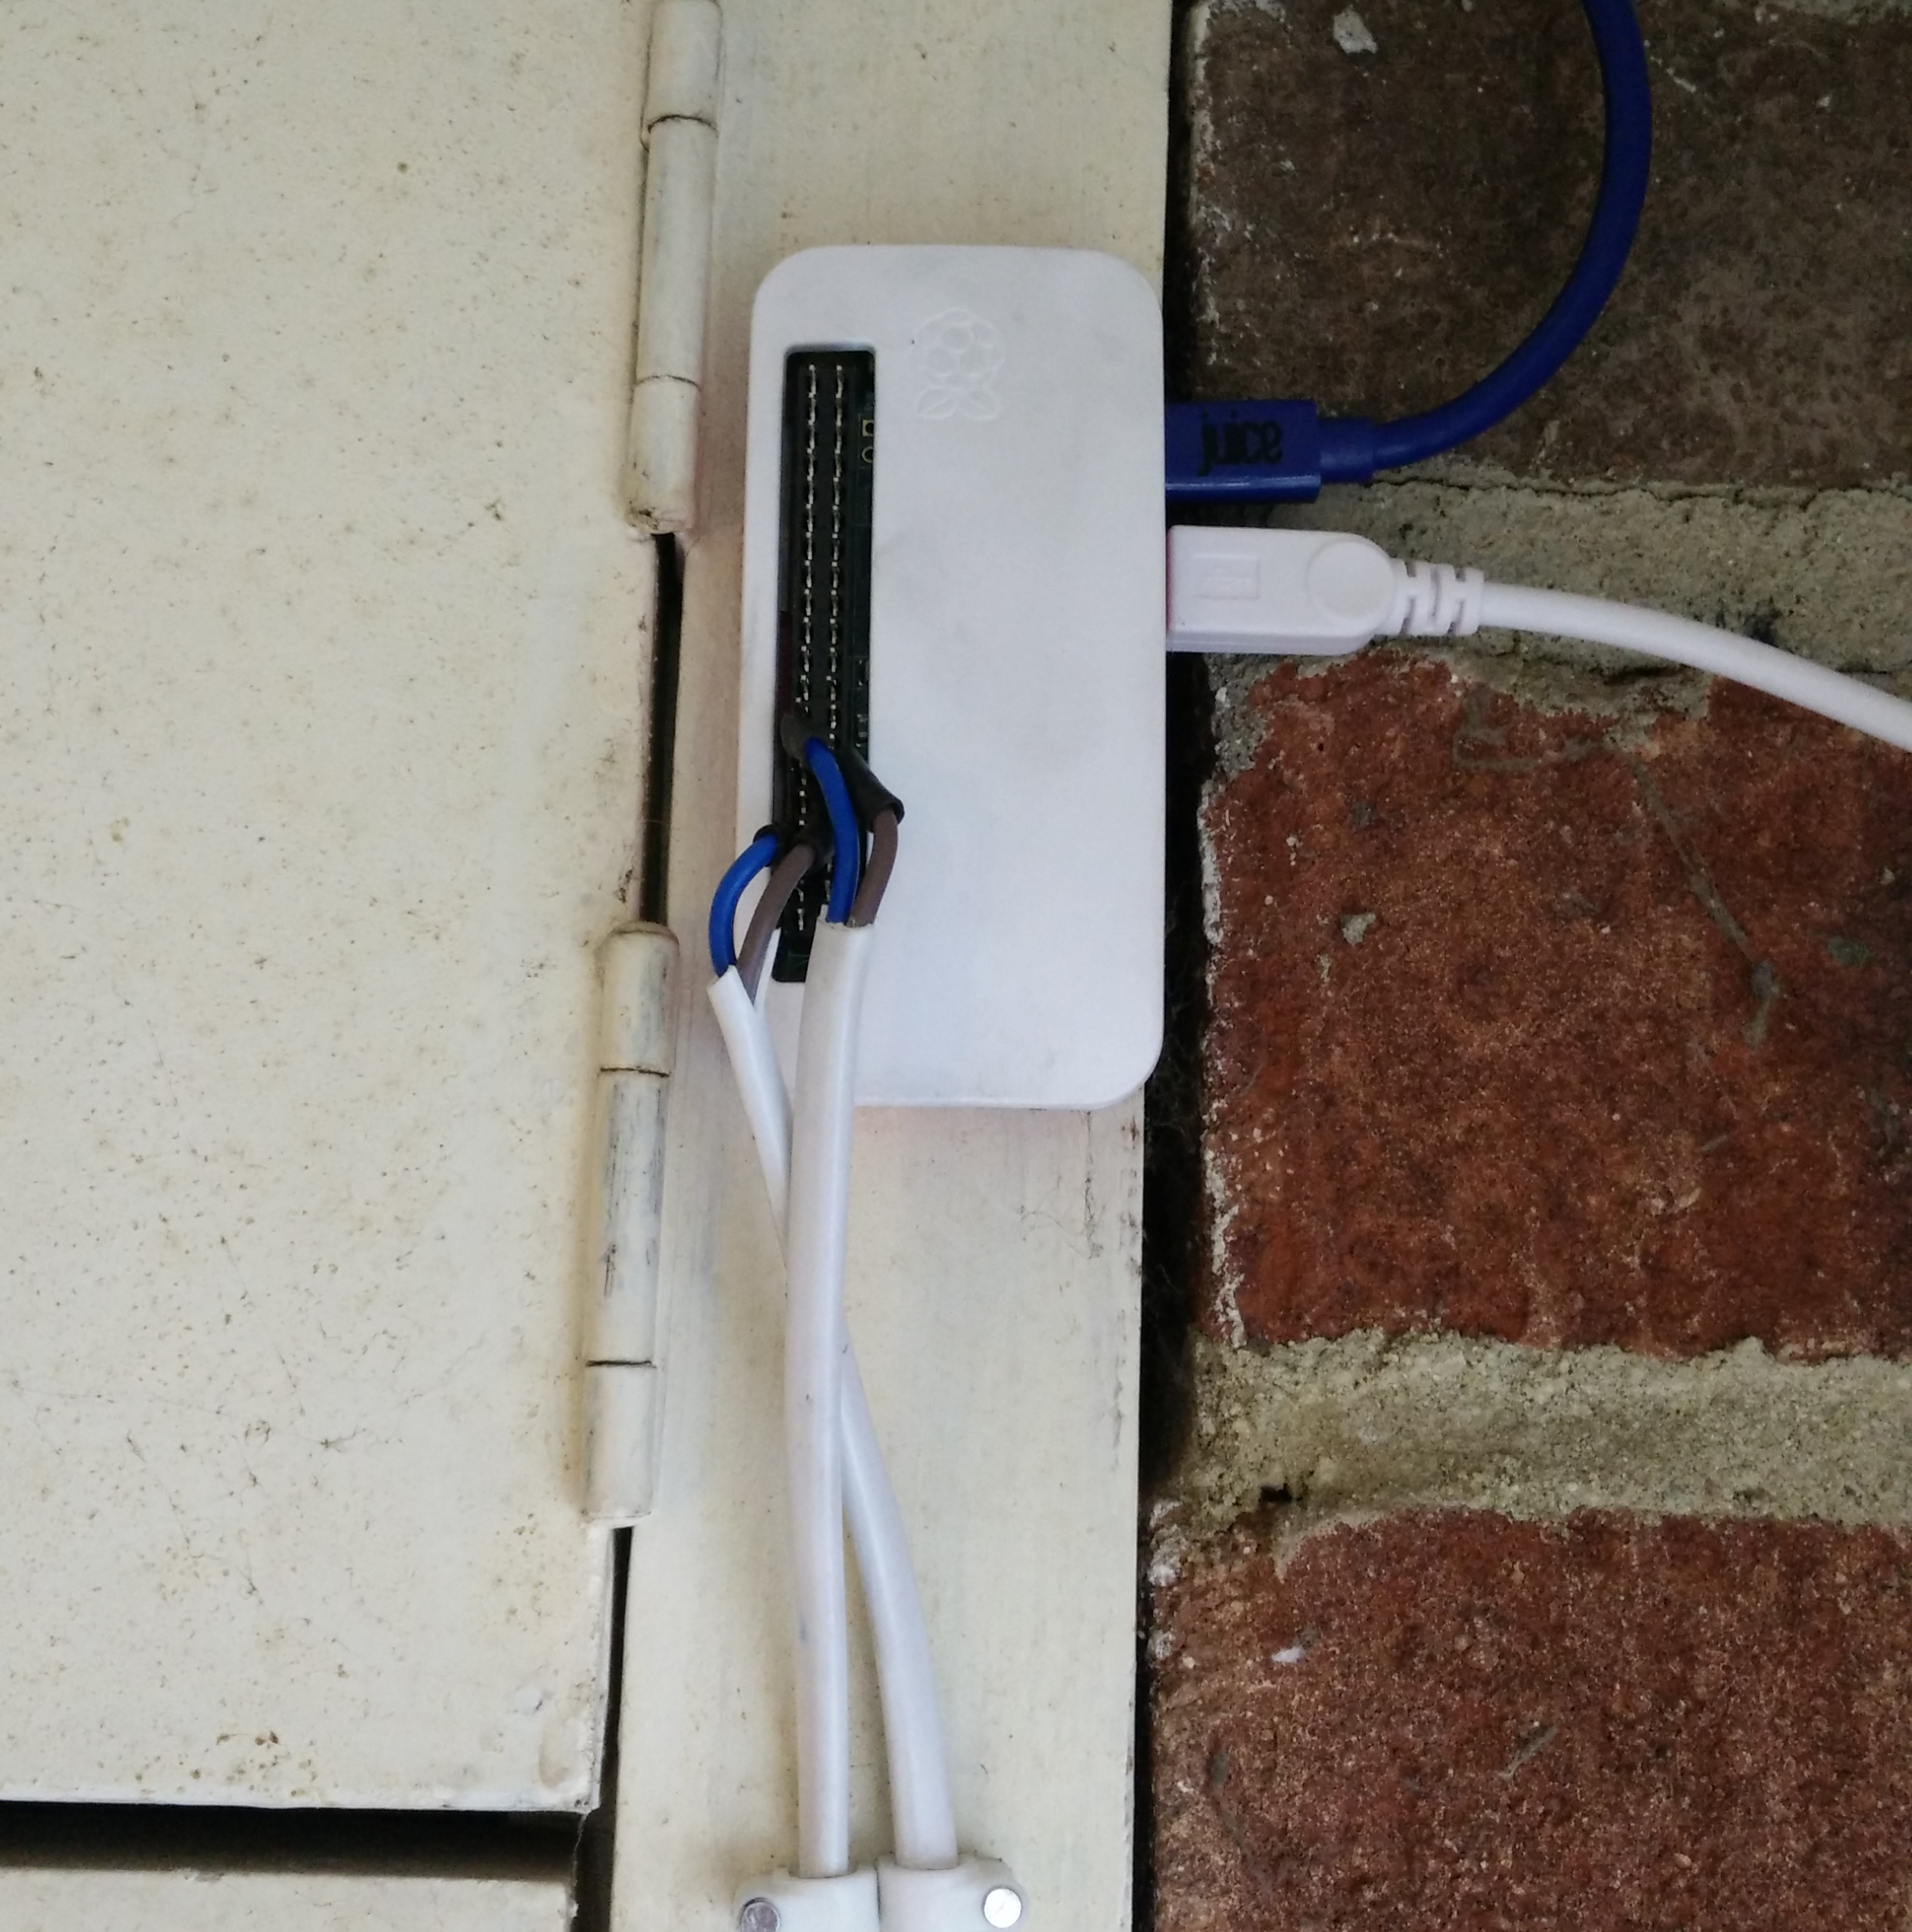
I wanted to make everything semi-permanent as there’s a good chance of me moving or switching things around in the future. To that end I used some spade connectors to connect the wires to the button. The connectors I bought were slightly too big so I had to squash then a bit with a pair of pliers, but they do the job. The other end of the wires are connected to the Raspberry Pi’s GPIO pins. To keep them removable, I soldered them on to the pins on the back on the female header, which then plugs into the male headers on the board. Each pin is insulated with a small piece of heat-shrink wrap.
The button has 2 pins for the button itself (actually 3 – ground, normal open and normal closed, but I’m only using ground and normal open), and 2 for the LED ring, so I used 2 of the Pi’s GPIO pins for input/output, and 2 ground pins. It also has a resistor built in for the LED, which made it simple to connect up. I cut 2 lengths from the 5m of flex to give me the 4 cores I needed.
I drilled a 10mm hole in the front of the enclosure for the button and filed it out until it was the correct size. The button included a rubber gasket to keep it weatherproof. I also made a small hole in the top of the enclosure to run the flex out. The enclosure is larger than I would have liked, but the back of the button is 35mm deep and finding an enclosure with the required depth but less with and height was difficult.
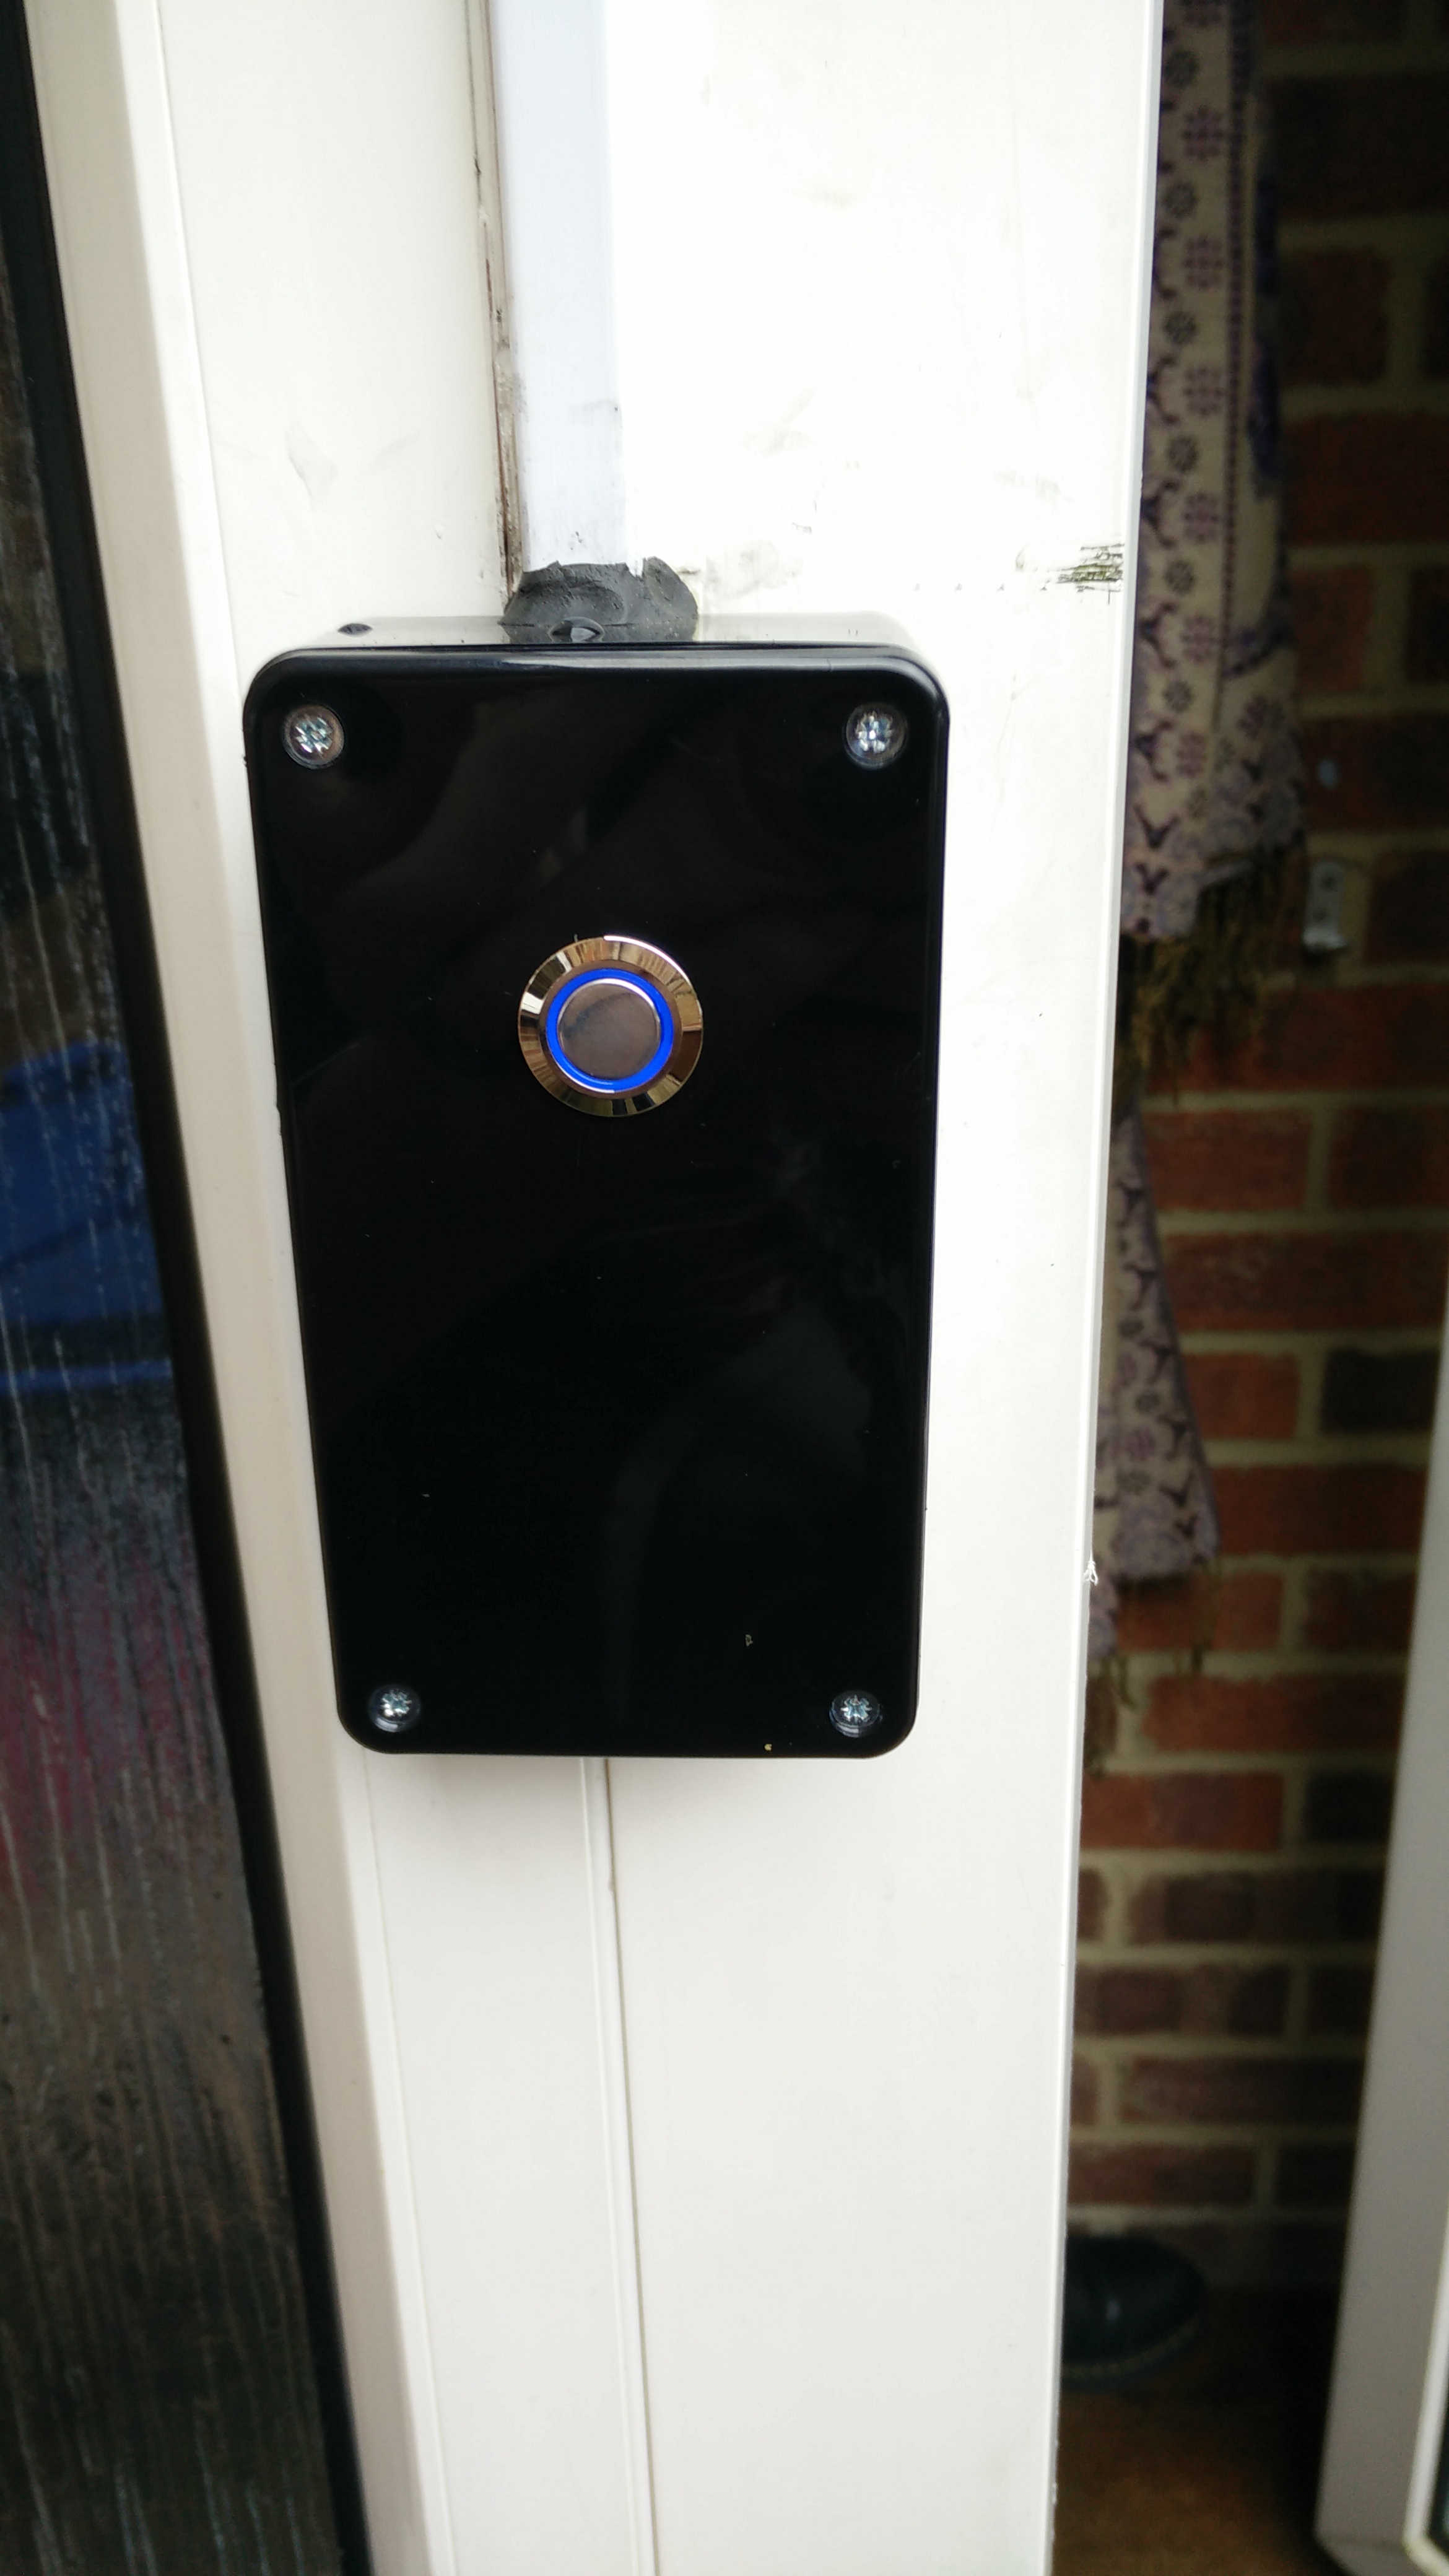
I removed the old doorbell and its wiring from outside, and I mounted the new one in its place. I ran the flex up through some trunking, and then in under a window seal to avoid drilling any holes in the frame. Some more trunking hides the flex running over the front door, and into the Pi mounted on the wall. I used some Sugru to stick the Pi’s case to the wall (the Pi itself can still be popped out) and to seal up the top of the enclosure.
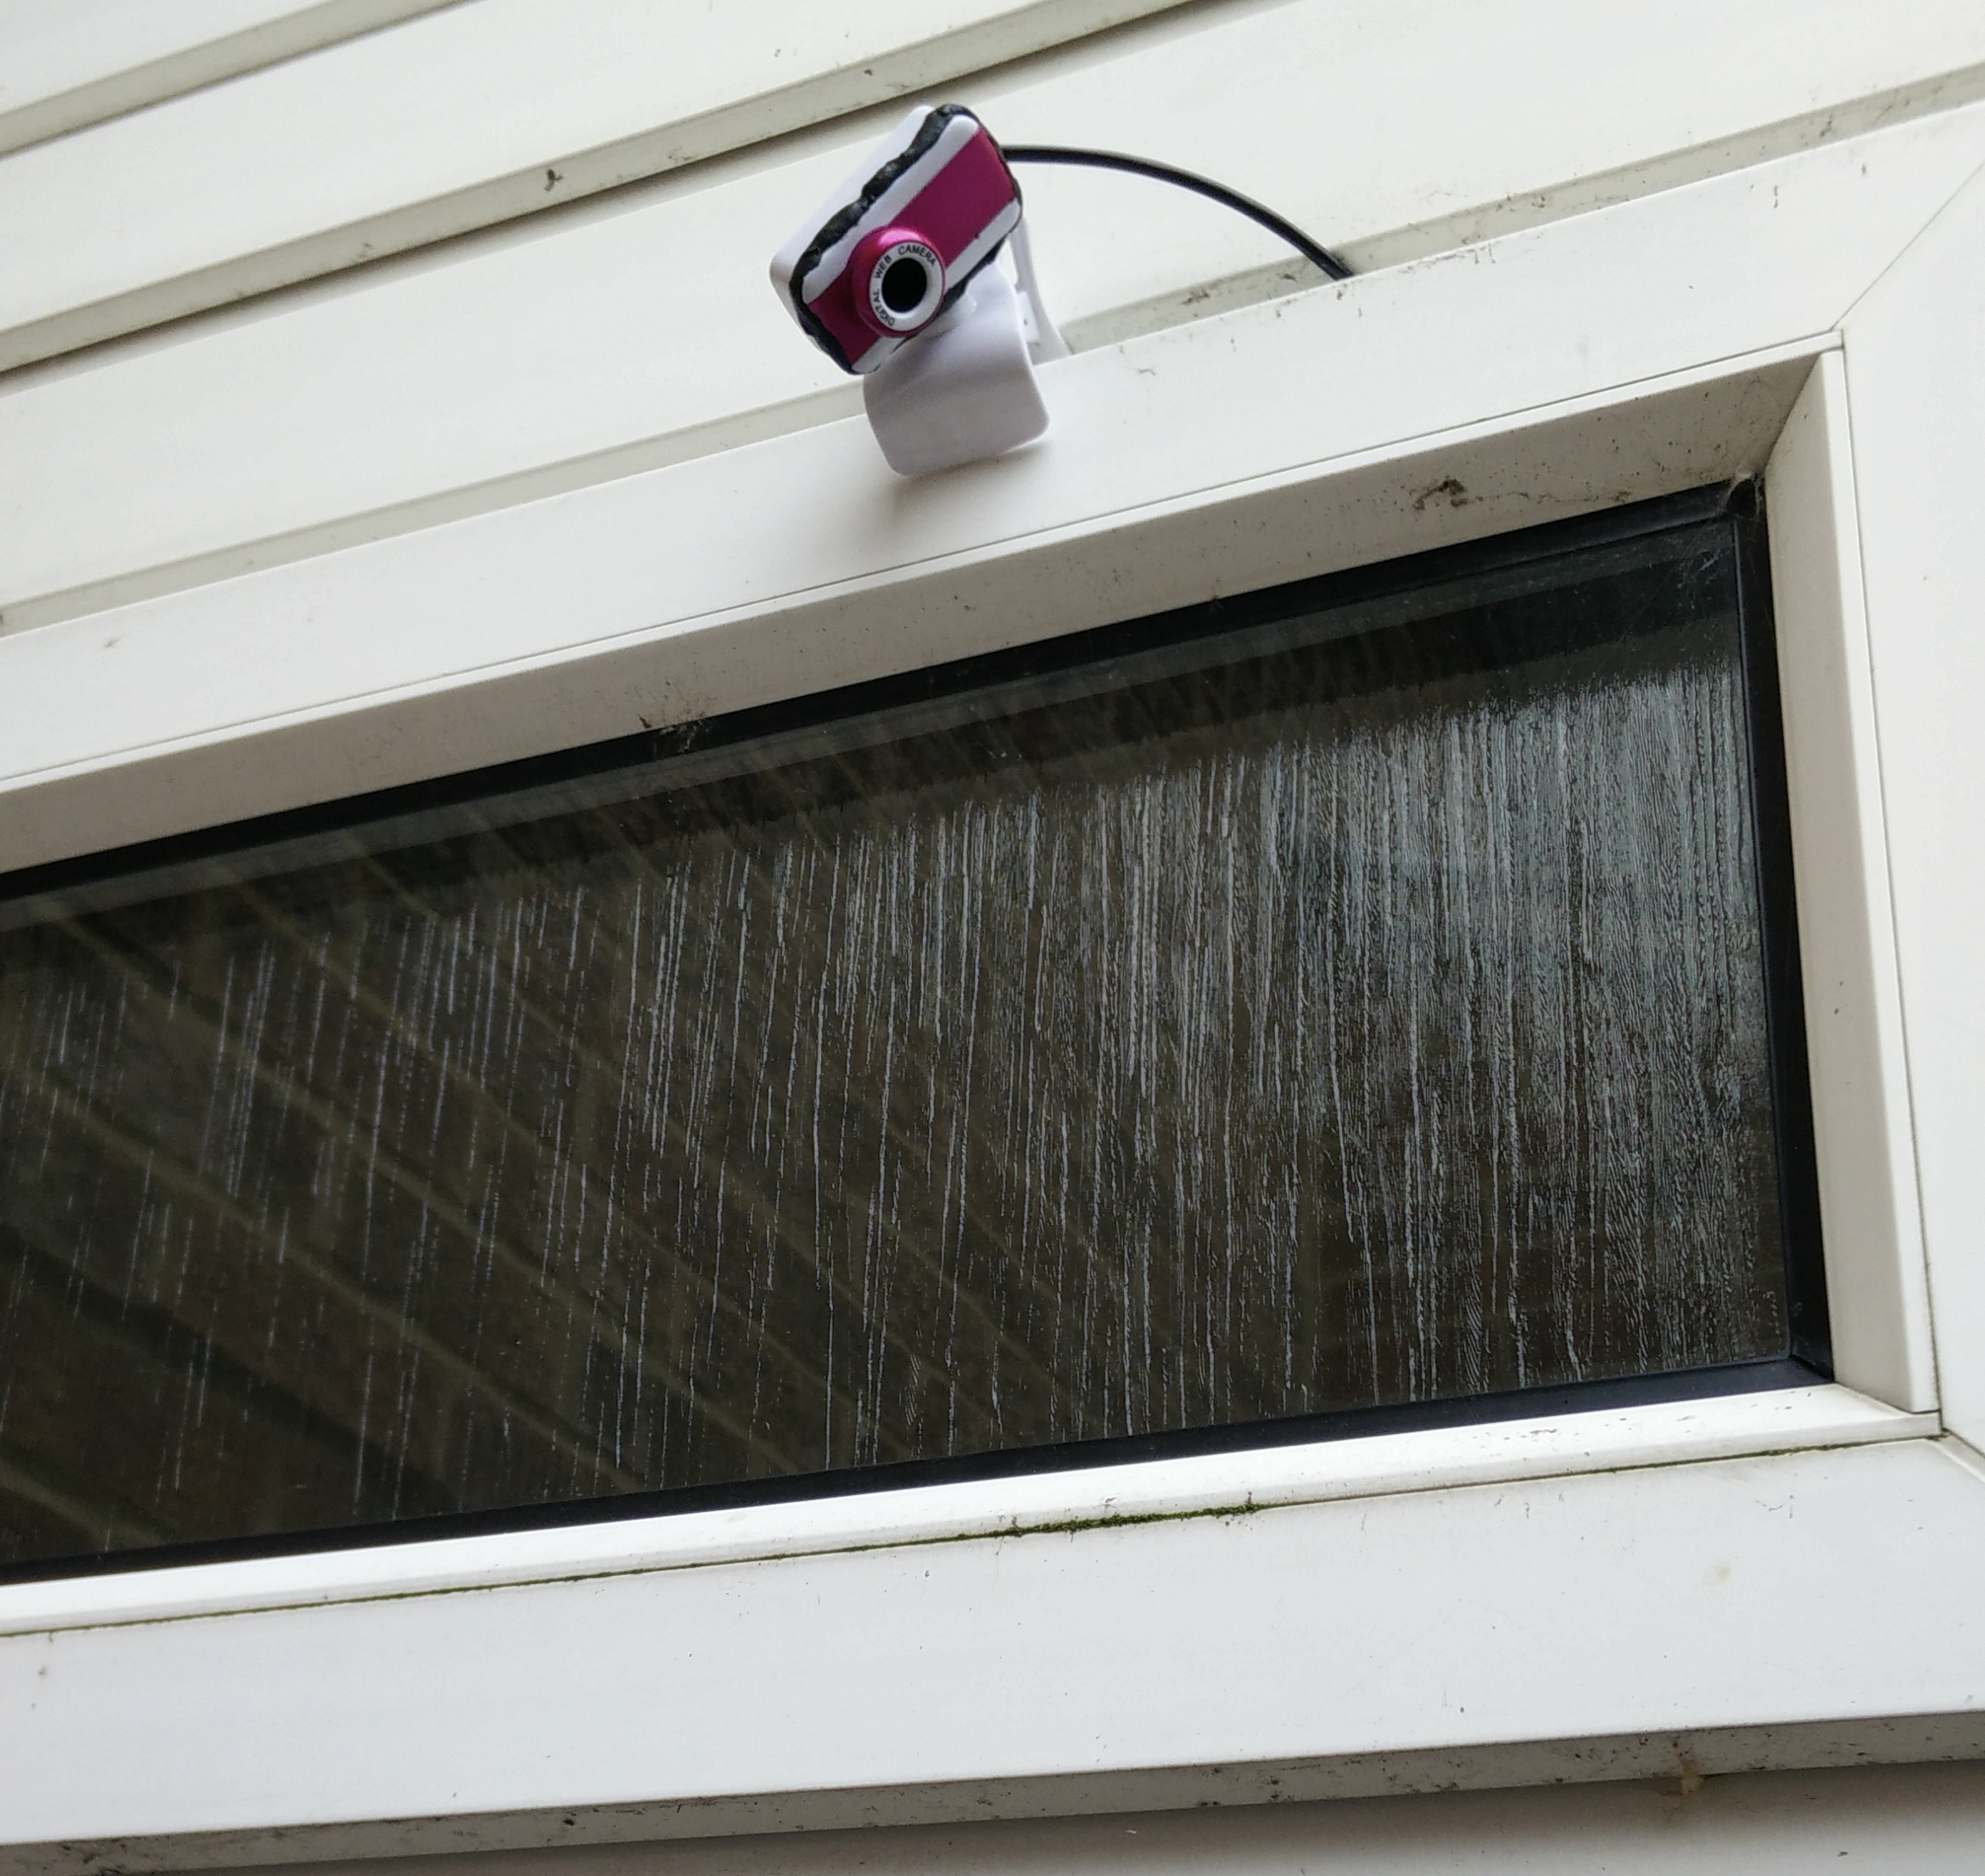
The webcam has a clip on the base which I used to mount it on the outside of the window. I ran the cable under the seal alongside the flex, and connected it to the Pi’s USB port using a regular-to-micro USB adapter. This was just a cheap webcam from eBay as a proof-of-concept, so I plan to replace this with a higher spec cam at some point. I also used some Sugru to seal up the webcam’s casing.
Software
This script is running on the Pi, launched on boot:
import os
import simplepush
from time import sleep
from gpiozero import LED, Button
from signal import pause
from kodijson import Kodi

led = LED(4)
button = Button(17)
kodi = Kodi("http://joggler:8080/jsonrpc")
pushid = "xxx"
pushpass = "yyy"
pushsalt = "zzz"
motiondir = "/var/lib/motion"
pingkodi = "ping -c 1 -W 1 joggler > /dev/null 2>&1"

def filterfiles(filename):
    name, extension = os.path.splitext(filename)
    return not os.path.isdir(motiondir + "/" + filename) and extension == '.jpg'

def getmtime(filename):
    return os.stat(motiondir + "/" + filename).st_mtime

def pressed():
    led.off()
    sleep(1) # Wait so that motion can capture a decent image
    filelist = os.listdir(motiondir)
    filelist = list(filter(filterfiles, filelist))
    newest = max(filelist, key=getmtime)
    os.system("scp " + motiondir + "/" + newest + " doorbell@webserver:~/")
    imageurl = "https://webserver/doorbell/" + newest
    streamurl = "http://doorbell:8081"
    if os.system(pingkodi) == 0:
        kodi.Player.Open({"item": {"file": "/home/joggler/doorbell.ogg"}})
        kodi.Player.Open({"item": {"file": imageurl}})
    simplepush.send_encrypted(pushid, pushpass, pushsalt, "Doorbell", imageurl + " \n" + streamurl, "doorbell")

def released():
    led.on()

button.when_pressed = pressed
button.when_released = released

led.blink(.5, .5, 3)
led.on()

pause()
Motion is running all the time, automatically capturing images and video when the webcam detects movement. When the button is pressed, it grabs an image and uploads it to my local web server. If the Joggler is turned on (determined by trying to ping it), it then uses Kodi’s JSON-RPC API to play a doorbell sound on the Joggler, and tells it to display the uploaded image. It also uses Simplepush to send a push notification to my phone with the URL of the image (which I can access anywhere), and the URL of the live feed from Motion (which I can access if I’m in the house).
I chose Simplepush as it supports end-to-end encryption, so no-one is intercepting the URLs of the uploaded images.
The led.blink() line is a handy way of indicating when the Pi has finished booting and the doorbell code has initialised.
Other than improving the web cam, I’d also like to send the push notifications to my partner’s phone, and it would be good to have an always-on device that uses less power than the Joggler to provide a doorbell sound if our phones and the Joggler are turned off or silenced. The picture that’s captured when the button is pressed isn’t from the perfect moment to capture the caller, so I can probably be smarter about deciding which picture(s) to upload. I should also add some logging to the script to debug any problems.