GuruPlug - Part 2
Powering on the GuruPlug was pretty straightforward. Turn the socket on, lights flash, network connects, job done.
However, not being provided with any documentation, I was left out in the cold as to how to access it.
As I expected, it was configured to use DHCP be default, so I was able to find it’s IP address from my router. However, I was never furnished with the root password. Luckily for me, someone had created a GuruPlug Quickstart guide on (now defunct) the plugcomputer.org wiki, which contained this nugget of detail (I’ve since changed it, in case any opportunistic crackers are reading).
sheevaplug-debian:~# cat /etc/apt/sources.list
deb http://ftp.us.debian.org/debian/ lenny main contrib non-free
deb http://http.us.debian.org/debian stable main contrib non-free
deb http://security.debian.org lenny/updates main contrib non-free
deb http://www.backports.org/debian lenny-backports main contrib non-free
deb http://10.82.108.51/kedars/sheevaplug_wifi/builds/packages/ binary/
The GuruPlug ships running Debian “Lenny” 5.0 with a minimal set of packages. The enabled repositories include the standard Debian binary repos, plus backports.org and, bizarrely, a WiFi driver repo pointing to a 10.x.x.x address, presumably left over from the factory install. Disable that, then.
sheevaplug-debian:~# df -h
Filesystem            Size  Used Avail Use% Mounted on
tmpfs                 251M     0  251M   0% /lib/init/rw
udev                   10M  708K  9.4M   7% /dev
tmpfs                 251M  4.0K  251M   1% /dev/shm
rootfs                463M  207M  256M  45% /
tmpfs                 251M   23M  229M   9% /var/cache/apt
The base system takes up about half of the 512MB internal flash. Having attached a 1TB hard drive, it only seems sensible to expand the available space somewhat.
I won’t go into the nitty gritty, but suffice to say I used LVM for flexibility, and put /home /usr and /var on their own partitions.
Now that I had somewhere to put a home directory, next step was to create a user. The ‘Plug only comes with the root user setup, and logging in as root is poor form, so I set myself up a user with sudo privileges.
A quick reboot to make sure everything’s working and… Oh, wait a minute… it stopped connecting to the network. No worries because whenever you reboot it reverts the wireless to Access Point Mode. Except… that didn’t work either. And no remote access means no log in. Ah.
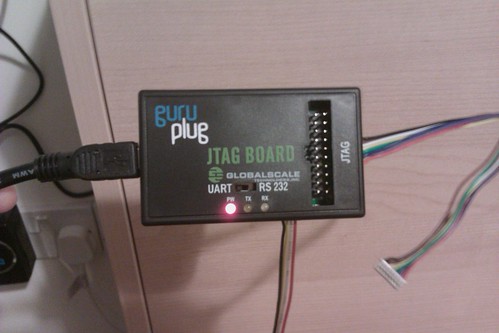
It turns out that I needed to buy a JTAG boards in order to access the GuruPlug’s serial port. Remember that USB cable I mentioned in part 1? Turns out that the JTAG plugs in to the ‘Plug and acts as an adapter. If you clicked that link, yes you’re reading it right, that’s £30 to get access to my own device.
Suffice to say I wasn’t overly chuffed by the situation. The NewIT website implies that there’s some sort of Mini-USB connection to the device itself (as was the case with the SheevaPlug) and the only indication otherwise was in the documentation that I was emailed 2 days after I received the device.
Fortunately for me, NewIT saw my point of view on this and offered my a discount on the board, which I gratefully accepted. But please be aware that if you’re looking at getting a GuruPlug for anything other than it’s out-of-the-box functionality, buy a JTAG board too!
So, a day after my email discussion with NewIT’s customer services, I got my JTAG board. Here it is:
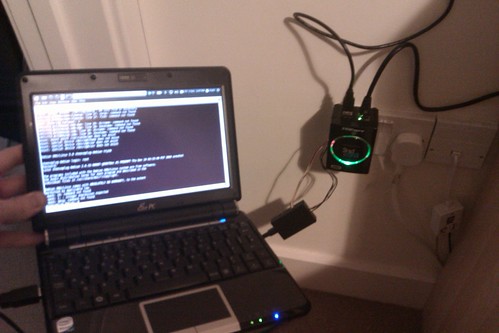
I hooked the funny wiry connectors to the ‘Plug and the USB connector to my EeePC, an connected through Minicom
On rebooting, I could see that the LVM devices weren’t being found. I’m not sure exactly why this prevented it from connecting to the network, but I’m guessing there’s something important in /usr or /var that it couldn’t access.
After a few posts on the HantsLUG mailing list and analysis of the boot messages, it turned out that the USB disk wasn’t being “found” by udev until after LVM had initialised and scanned the Volume Groups. This in turn meant that the logical volumes weren’t active when they needed to be mounted, leaving me without a /home /usr or /var.
The mailing list and some Googling told me that most distributions had solved this problem with udev rules that re-scan the volume groups when a new device is discovered, but Debian doesn’t appear to have gotten there yet (at least, not in Lenny). I’m no master with udev rules, but I do know my way around an init script, so I modified /etc/init.d/mountall.sh (the script that mounts everything in /etc/fstab) to manually re-scan the volume groups before it tries to mount. It’s not pretty, but it works.
...
pre_mountall
vgscan # re-scan the Volume Groups
vgchange -a y # Activate the Logical Volumes
if [ "$VERBOSE" = no ]
then
        log_action_begin_msg "Mounting local filesystems"
        mount_all_local
        log_action_end_msg $?
else
        log_daemon_msg "Will now mount local filesystems"
        mount_all_local
        log_end_msg $?
fi
post_mountall
...
So, now I can get back to business setting up the software. Join me again in part 3!